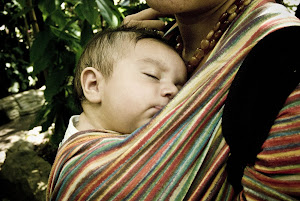
..."popsicles on the porch"...what a great afternoon treat and our favorite way to spend time together! These are simple and precious moments! Princess #1 and Princess #2 along with Little Man #1 and #2 are my inspiration for most of these writings.

Tuesday, November 30, 2010

A Family Tradition....Celebrating Advent!


We're celebrating advent! The Jesse Tree is a family tradition we do every year, but this year we're tweaking it just a little. 


Since we've already made our Jesse Ornaments from previous years, this year we'll wrap them up and place them underneath the tree. Each night one kid will get to unwrap the ornament followed by that night's scripture reading and devotional and hang it on the tree. Maybe the kids will even get to put on a little skit and act out the story for us. ; ) 


To find out more about the Jesse Tree read more HERE.

Monday, November 29, 2010

I DID IT!


I attended my first homeschooling convention this past summer.  You know the one, the "mother of all conventions" held in the Woodlands every summer.  If you've never been or if you ever get the chance, I'd highly recommend it.  You've got to go at least once!  There are so many wonderful educational materials, resources, and informative seminars for just about any homeschooling parent.  


Whether you're a veteran homeschooler who needs fresh ideas or just a beginner like me, there is something there for everyone.  Heck, even f you're not a homeschooling parent, just thumbing through all of the delicious books and educational resources is enough for me. I'm not just talking about curriculum, but books, games, manipulatives, school supplies, and etc.... 


However, I must warn you...a newbie like myself is sure to get lost in the sea of booths in the exhibit hall. I absolutely loved it! I just wished I had the budget to buy everything I had my eye on!


On the practical side, here was something I picked up that has really come in handy. ...the I Did My Chores Chart! We've been using it for the last few months and the girls love it!  Not only are they learning responsibility but they're also learning the rewards of hard work. 


Here's how it works:


Chore cards are color coded to reflect the time of the day and assigned morning, noon, and night.  When a chore is completed, they immediately place it in the "I did it box!"  At the end of the day, they receive a token for each card in the box.  Tokens are then redeemable for rewards previously established. For example, 5 tokens could be redeemable for a piece of candy, 8 tokens for a free dessert, 15 tokens for extended bed time....you name it!


Of course, the other side of this thing is that tokens can also be taken away.  My girls have felt the sting of this and hate withdrawing money from their piggy bank to give to mommy.


Since our first grader is learning how to count money, we've altered the system a bit.  Instead of collecting tokens they are earning small change: a nickel per card earned. The girls love to cash in their money for rewards like camping out in the living room and watching a movie or a trip to the dollar store. 


So far, we've had great success! I am most impressed that my four year old makes her bed first thing in the morning without fail! 


She even walked into my room one afternoon, took one look at my bed and exclaimed, "Mommy, I think we need to get you a chore chart too!" Ouch! : )


Friday, November 12, 2010

Pink is the color, Barbie is the theme and Potterybarn has been our Inspiration

Since Tim has had off this week, we’ve been busy around the house tackling various projects.  
With that in mind, I have been wanting to cover the girls' bedroom window, but just wasn't sure yet about what to do -- until I came across a pair of tulle curtains a friend had given us a while back. Surprisingly, they resurfaced this week while we were cleaning out the garage...imagine that!  Since they didn't fit over the bedroom window, we got a little creative and decided to use them to frame the dressing area of the girls bedroom closet. 


I still have to paint, but doesn't it look cute. I love that we were finally able to put these to use. 


After hanging, I realized how simple the stitch looked and decided to make another set of tulle curtains for the bedroom window.  Being such a beginner sewer, I was a little intimidated about sewing tulle, but was amazingly surprised at how easy it was!  Nothing like a little inspiration to get you going (and a little encouragement from your sister who of course can make just about anything!).   


So, here is the tulle valance I made for the girls bedroom window. It has a zebra print border and pink jewels. Very girlie for my two girly girls. 


Now, onto the tulle bedskirt modeled after the ones in Potterybarn. This bedskirt sells for $150.00 for a twin size bed. Five yards of tulle for the above cost me $6.00 at Hobby Lobby. You do the math! ; ) 


Wednesday, November 3, 2010

Costume Fun 2010

After all my smack about not having enough time to sew costumes for the girls, I ended up caving in when I couldn't find Isabella's costume anywhere.  It seems Word Girl was a pretty popular costume for her size, not to mention shipping would have cost me a fortune!

After researching a little on the internet, I got some great tips from other mommys on how to put the outfit together without breaking the bank.  I dug around a little bit and realized we had an Incredibles costume from last year that we could reuse as Word Girl's red leotard. My only issue would be covering up the black sleeves, ankles, trunks and Incredible emblem on the front of the chest.  

Here's where the mommy tips came in handy!

For Word Girl's shield, I used red and yellow foam craft paper from the craft store.  Tim helped me draw the shield (because I am so not an artist) and star. I then simply cut these out and stuck them over the Incredibles emblem. 

For the headpiece I cut out a piece of red stretch fabric and hot glued it to a head band. Then i simply added velcro to the bottom side of the head piece to attach underneath her chin.  

The belt was an old stretch glitter belt that I use to have from one of my many years in dance and drill team. I simply cut out a yellow and brown circle from the same foam paper and stuck it onto the belt. To give extra security I added a few stitches.

The sleeves were the easiest of all.  I used red felt which helped bring out the darker red Word Girl uses around her wrists. 

I also had to make red trunks to go over the black trunks on the Incredibles costume. This was the hardest part for me.  I had no clue what to do and didn't want to mess up the costume as I'm sure the boys will be into in just a few short years. Not to mention, it was very late and I was really sleepy.  I ended up playing around with the red fabric (used on the head piece) and came up with something to simply get us by for the evening. 

My favorite tip was making Word Girl's red boots. We used a pair of long red socks to be worn over her tennis shoes and we had an instant pair of red boots!  Of course, by the end of the night we had to throw the socks away, but replacing those is a piece of cake should we ever decide we need them again. 

Two late nights sewing until 4 am and here is the final product...


She absolutely loved it and was super grateful which ended up making the bags I am now sporting underneath my eyes all worth it! 

And if you noticed above, she's holding Captain Huggy, Word Girl's sidekick! (Isabella just had to have him! )  This was a last minute project Sunday morning right before we headed to church. It literally took about 5 minutes.

We borrowed a blue T-shirt from Cash and put it on his monkey (the extra one that is only for emergencies). I used some scrap yellow fabric from Word Girl's cape to make his belt and simply tied this around his waste. I cut circles out from the foam paper and hot glued it to the yellow belt. I cut out a yellow lightening bolt also from the foam paper and glued it to the front of his chest. For his head piece, I used the scrap red fabric that we used on Word Girl's head piece and tied it around his head. I tucked the knot into the collar of the blue shirt. (I told you this was a last minute thing!) Then I cut out slits for his ears to stick out and there you have it....Mr Huggy!

The other 3 dressed up as characters from the Cat in the Hat. I got the idea when I walked into a consignment shop to inquire about selling some items and spotted a Thing One and Thing Two Costume! I couldn't resist. After that, I hyped up the idea to Elianna on being the Cat and the Hat. She was sold after I mentioned painting her face and wearing red lip stick!

So here is Elianna as The Cat in the Hat! (I purchased the hat, bow and gloves and sewed her tail on).


And we can't forget about Thing One and Thing Two...


Thing One refused to wear his blue hair and was unsure about what to do most of the evening, but he loved getting pushed around in his wagon and eating candy!


The cutest and happiest Thing Two I ever did see! He fought his brother for candy the whole night!